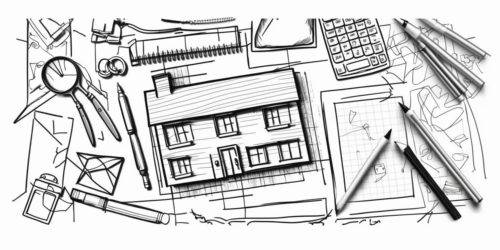
Sketching an extension for your home can be an exciting opportunity to create the space you’ve always dreamed of. With a step-by-step guide, you can transform your ideas into a tangible sketch. Start by visualizing the size, shape, and flow of the new space and incorporate any additional features that will enhance the design. Remember, this is just the beginning, and with the help of an architect or designer, your rough sketch can evolve into a stunning reality. So go ahead, let your imagination run wild and sketch your way to the home of your dreams!
Guide for sketching an extension
Task 1.
- Sketch out outlines of both Ground and First Floor plans.
- Annotate all Room Names.
- Show Rough Positions of Doors and Windows.
- Show staircase position with arrow showing upwards direction.
“Please note all drawings can be line drawings (without the wall thickness) however the
thickness of a typical internal and external wall is required”
Task 2.
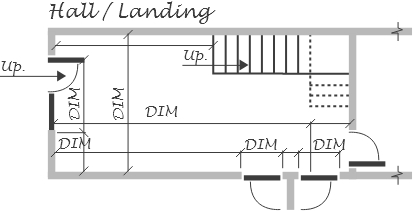
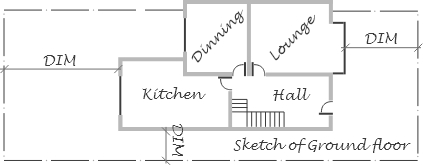
- Sketch out Hallway and landing areas.
- Show Staircase, doors, windows.
- Provide dimensions as illustrated in FIG 1.
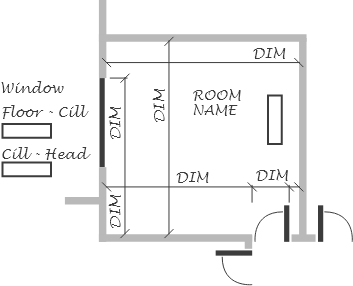
Task 3.
- Sketch out each individual room as FIG 2. (these don’t have to be on separate sheets if you would prefer to do them all together, just ensure they are large enough to dimension)
- Show doorways and windows.
- Provide heights for cills, heads and ceilings.
- Provide dimensions as illustrated in FIG 2. and annotate the room name.
“The best way to provide the required information is to dimension the hallway and landing of the property, this provides a bench mark for us to set all the other rooms from.
Good rule of thumb is – measure length and width of every room and when measuring opening also measure back to one corner of room as an anchor point”
Task 4.
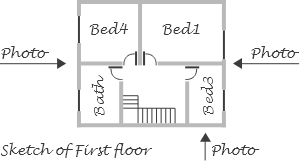
- Provide as many photos as you feel necessary to allow us to get a feel for the property. FIG 3 denote the minimum photos required.
- Provide photographs to highlight boundaries, manholes to allow accuracy.
Task 5.
- Provide external dimensions as per FIG 4.
- Provide the external dimensions of property if possible.
Task 6.
- Provide a brief description of your Proposed requirements.
- How many floors.
- Use of proposed rooms.
- Pitched or flat roof.
- Any info you think beneficial for us to produce an initial sketch scheme.
Task 7.
- Email the information and sit back a relax, we will look at the information and report back to you within 5 working days, once we have the relative information, we will produce a scheme for your perusal within 10-15 working days.
IF YOU NEED BUILDING REGS DRAWINGS, LET US HELP YOU
Send us your Planning Drawings and we will provide a no obligation quote!